Zero Clearance Plate for Table Saw
I’ve been wanting a Zero Clearance Plate for a Table Saw for sometime now. I could buy this one Craftsman 21833 Table Saw Zero-Clearance Insert CR-4 from Amazon, but ultimately I decided to make my own. I have a Craftsman # 21833 saw. The saw is great but it comes with a standard plate and I’ve been reading for a while now how it causes more tear out. Also, when I made smaller cuts (think 1/8″ – 1/2″ width cuts) the board will simply fall into the gap and into my table saw. Eee gads..!

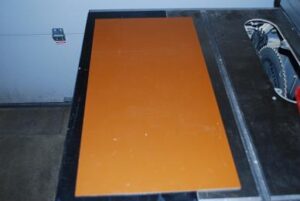
When I started my research on this I found that most plates are 1/2″ in width and most folks would simply buy a 1/2″ piece of hardwood or mdf and trace it and cut it out with a band saw. Sounds simple huh? Unfortunately for my saw it required a 1/8″ thick board. I tried a couple of pieces of hardwood and traced it and cut it out on the bandsaw. What I quickly found out was that 1/8″ hardwood quickly warps itself and it also contracts and expands with climate. It wasn’t a good fix, I was frustrated and almost gave up on the idea. Then it occurred to me to simply buy some Phenolic- Grade material (yeah I had never heard of this stuff either) it’s the same material that store-bought plates are made of. I was able to get the width I needed and I could make several of these bad boys if I needed them.

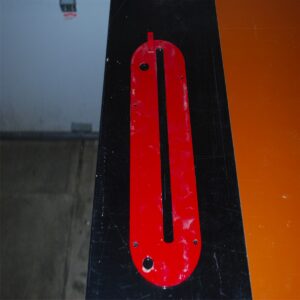
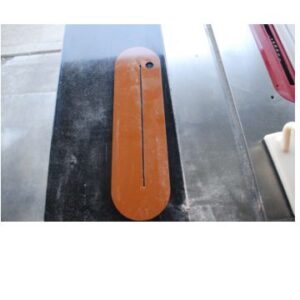
How I made mine was to start by cutting my material to a length approx. 1/4″ longer and wider than my tablesaw plate. In hind sight I think I could have made it 1/8″ and still been safe. Next I took my table saw plate and used double stick tape and attached it to the material. On my plate there was a small notch on the plate so I had to put my plate upside down on the material. Next I used a trim bit on my router table and simply allowed my plate to be a guide for the trim bit. It worked like a charm. The bit makes an exact copy of my table saw plate. The next thing I did was cut a 1/2 inch hole into the new plate to give me a way to remove it from the tablesaw.
Last step was to place the new plate on to the tablesaw. I quickly found that I needed to lower my riving plate as far as possible. Then I simply used the fence to help hold the plate in place. I also used a piece of scrapwood to hold the other side and I started the saw and raised the blade until it cut out a slit for the blade to go through. The whole process probably took me an hour or two to complete. It was my first time using a trim router bit, but trust me it’s a snap to use. I would recommend a trim router bit that doesn’t have a length between the blade and the guide. I had two trim bits, and I noticed one had a pretty big gap between it. In my case because the board needed to only be 1/8″ I didn’t have a lot of room for error.
I’ve included links below for the material and bits I have used. Hopefully this helps out..!

How did you hold your home made insert in saw? The front of mine is held with mag.
Mine just snaps into place. It’s sized just right. Magnet is a great idea though.
I tried to make one,out of hardwood, it turned out quiet well I just did not feel safe with it. I have a Craftsman table saw and the original was piece of crap. I got a new one from Amazon Leecraft it fit right in and it is strong as can be, it has a strong clip as well as a screw to make it fit tight. I had a few close encounters with things falling into the machine with the original plate. I think that plate from Sears was a terrible safety hazard. Everyone is so concerned about kick back the forget the other dangers. A zero clearance plate is a must.
Does this plate have any flex? Seems very thin without any support glued as a second layer?