Window Bird House – Nestbox
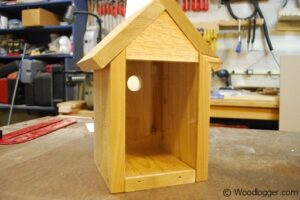
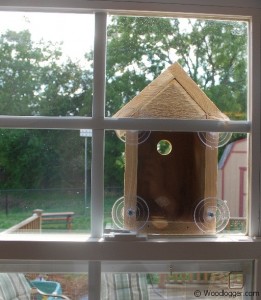
I spotted a window birdhouse nest box a while back and thought it would be a fantastic project to undertake. After gifting my dad one for Christmas last year, I was inspired to make one myself. I explored a few different designs and ultimately decided to follow a plan from the book: Bird-Friendly Nest Boxes and Feeders: 12 Easy-To-Build Designs that Attract Birds to Your Yard. I did make a few adjustments to the dimensions to better fit my needs, and I added suction cups to the back so I could attach it directly to a window.
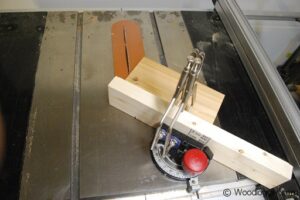
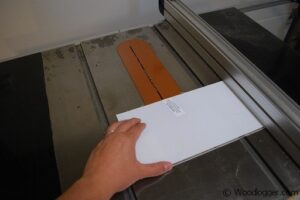
For the clear plastic, I used sheets sized at 5×7, which you can easily find at most stores that sell picture frames. I had some leftover plastic sheets from a previous project and managed to cut them down to size using my table saw. While I’m not certain if there’s a “best practice” for cutting plastic sheets, my method worked well enough.
This project is a great weekend activity! If you follow the plan in the book, it typically shows how to hang the feeder in a traditional manner. However, I thought placing it on my daughter’s window would be both fun and educational for her. After completing this one, I’ll probably need to make another for my son’s window, too!
Here are some tips if you’re considering making your own window birdhouse:
- Choose the Right Location: Position the birdhouse on a window that faces a safe area, free from heavy traffic and predators. This will encourage birds to visit regularly.
- Secure Attachment: Use strong suction cups or brackets to attach the birdhouse securely. Clean the window surface well to ensure maximum adhesion.
- Ventilation and Drainage: Include small ventilation holes and drainage holes at the bottom to keep the interior dry and comfortable for the birds.
- Bird-Friendly Materials: Use untreated wood or safe plastics to ensure the birdhouse is safe for feathered friends. Avoid toxic finishes or materials.
- Educational Opportunity: Set up a birdwatching station nearby where your kids can observe and learn about the different bird species that come to visit.
If you decide to make one of these window birdhouses, I’d love to hear about your experience! Don’t forget to check out my attempt at creating a video tutorial on how to make this project. If you build one, be sure to share it over on the WoodLogger Facebook Page. I can’t wait to see how yours turns out!
Materials
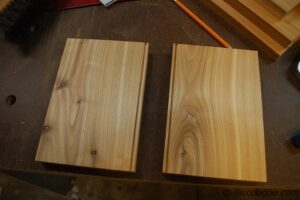
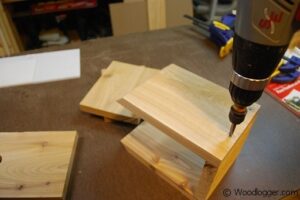
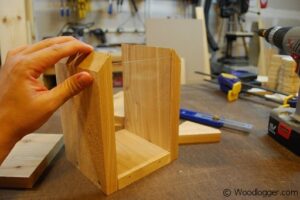
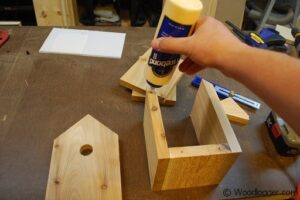
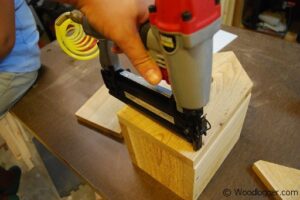
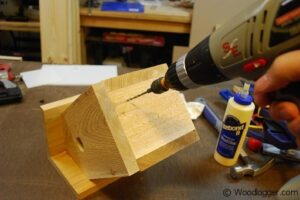
For the lumber I used Cedar that I purchased from Lowe’s. I was able to do the whole thing using only 1 board. For the back I used a scrap piece of plexiglass that I purchased at Hobby Lobby. The opening is 5″x7″ so you can find a pre-cut piece pretty easily at most stores. I used an exterior rated glue with all my joints(except the bottom). To hang the house I attached 4 suction cups to back. My house will hang from a window. I was able to build the entire project for under $25.
- (1) 1″ x 8″ x 6′ Cedar Board
- (1) 5″ x 7″ plexiglass – back
- (4) Suction Cups with screws
Milling & Assembly
Finishing
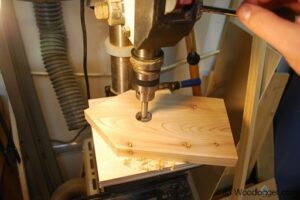
I made this house of cedar so it’ll age just fine outside. I attached suction cups that had screws with them. I bought a kit for that and it attached very securely to my window.
Now that you have had the window view birdhouse up for a while, how is it working out? Would you change anything? Blackout curtain inside the window so as not to scare the birds? How effective are the suction cups? Dowel perch on the front?
Looks like a fun build and I plan to do one this weekend.
Hey Richard, I hung up the house over the summer and it is as solid on the window with the suction cups, as when I first put it up. They were just standard suction cups I believe I got them at a hobby store. I haven’t had any birds nest in the house and from what I’ve read won’t till spring sometime…
So I guess that’ll be the real test. I have seen a few birds fly in and out, but none have stayed.
Good luck with your house, it was a fun one to make.
Daris,
How did you use the screws with the suction cups? If you run the screw through the cup, does it compromise the suction by allowing air to break the seal? Did you just use standard wood screws? Thanks for the help.
I drilled a screw right threw the suction cup. I used a smaller screw. The suction cups had a little nub on the end so it worked for me. I got the largest ones I could find though. I think I found them at Hobby Lobby.
I’m dying to know if it will work!!! I was going to buy one but for the price, I’d rather my husband make one. I also saw where of them came with a mirror type paper to put on the window so that they can’t see you. Please lets us know if you are successful with this!
HI Wendy, I did have “some” success. They built a nest in the box, but abandoned it shortly after. I had someone suggest that I apply a tinted film to the glass to make it harder for the birds to see out, but we could still see in.
Yeah, Daris – did the birds ever come. Great project. I think I’ll knock this one out as a gift!
It’s an excellent gift..! I did have some birds start a nest in there, however they abandoned it shortly after they built it. Someone suggested that I apply some sort of tinted film to the plexi glass to block the birds from seeing out, but allow others to see in. I may have to make a small adjustment to mine next spring…!
One way Reflective film on the plexiglass or even the window inside the house will certainly keep the birds from seeing the observer. Also, consider adding a perch, either a dowel or small shelf as landing area.
I am looking to build these as a gift for Christmas. Do you have the dimensions for all the cuts?
Hello. I was wondering if it would be safe with just 3 suction cups. Wouldn’t it fall after a short period of time or even if it is windy?
It just doesn’t fully make sense to me.
I would buy two way mirror film and put on window for privacy.