How to Build A Raised Garden Bed
- Facebook100
- Twitter16
- Pinterest737
- Mix
- Tumblr10
- Print492
- E-mail288
- 1.6Kshares
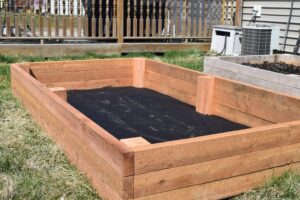 About a year ago, I built a raised garden bed, and it worked out so well that I decided to make another one. Raised garden beds are not only easy and quick to build (usually just a few hours), but they offer a variety of benefits for your garden. They improve soil drainage, reduce weed growth, and make it easier to control the quality of your soil. Plus, they’re easier on your back when it comes to planting and harvesting!
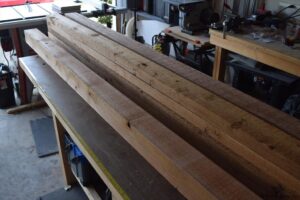
For this project, I used rough-sawn, untreated cedar—an ideal choice for outdoor use because it’s naturally resistant to rot and insects. When choosing lumber for your own raised bed, I highly recommend untreated wood to avoid any chemicals leaching into your soil, especially if you’re growing vegetables. Cedar can last for many years outdoors, making it a long-term investment.
I made my bed 4 feet wide by 8 feet long and 11-1/4 inches deep. These dimensions make the project super simple since you can just cut three 8-foot boards in half for the sides. For the corner posts, I used sturdy 4″ x 4″ cedar, and I held everything together with 2-1/2″ screws. The 4-foot width also allows easy access from either side, which is important for tending to plants without stepping into the bed and compacting the soil.
If you’re placing the bed directly on soil, consider adding a weed barrier at the bottom to keep invasive plants at bay. If you skip the barrier, it’s essential to clear any existing vegetation and turn the soil a couple of times to ensure your plants have the best start. Whether you’re growing veggies, herbs, or flowers, raised garden beds offer a great way to optimize your garden space and make tending to your plants more enjoyable.
If you make one of these be sure to post a picture of it over on the WoodLogger Facebook Page. I’d love to see how yours turns out.
Material List
- (9) 2″ x 4″ x 8′ Untreated Cedar (I used rough cut cedar)
- (1) 4″ x 4″ x 8′ Untreated Cedar (I used rough cut cedar)
Cut List
- (6) Ends – 2″ x 4″ x 4′
- (6) Anchors – 4″ x 4″ x 11 1/4″ (Check the actual width of (3) 2″x4″ to ensure the length of the anchor)
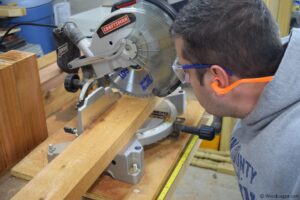
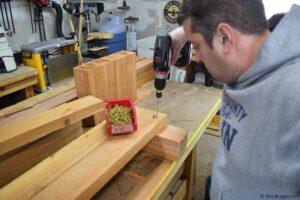
Milling & Assembly
Enter your email if you want a free subscription to this site(we’ll never share your email):
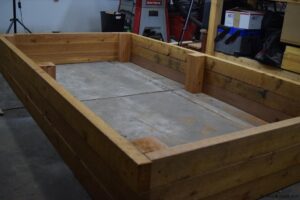
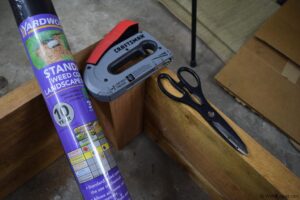
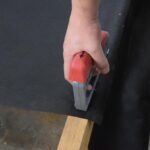
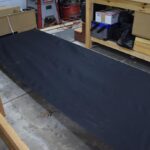
I just made two of these beds. They are great.
My husband and I just bought our first home and I’ve been looking for a decent tutorial to build raised planter beds for our backyard. Thank you so much for the clear instructions and photographs! I can’t wait to try this out!
How much soil is needed to fill this size bed?
about 16 Cubic Ft according to http://www.gardeners.com/how-to/soil-calculator/7558.html
for 4’x8’x1′, it would be 32 cubic feet or 1.19cubic yards to fill per the calculator
Could you recommend modifications to accommodate sloping ground? Can cedar be partially buried on the high end of the yard to keep it level? Thank you. Great site
Also interested in this answer!
Anyone have suggestions on this?
Dumb question, but do you need coated screws?
This is going to be my project for the fall when it cools down around here. I have been wanting to build some of these for awhile. I guess I need to get off my butt and start building.
You can use wood decking screws. And cedar is often used because you have less issues with rot from water/rain. I used it on my home made sandbox
a 2×4 is 1 1/2 x 3 1/2.
What was the total budget for your project?
also curious… when i add up everything based on what i see for prices online for lumber THIS IS NOT CHEAP :(
use decking lumber (5/4″) instead of 2×4’s. Cheaper. And also, the center supports can be replaced with decking lumber pieces. Saves on the total 4×4 length…. You could even go with smaller diameter square lumber for corner supports if you can find it…
I just calculated the cost, using his exact cut list, and it came to $154.80 from my neighborhood Lowes ; this includes a yard of soil from a local landscape company. Using 1x4x8 cedar for the sides and 2x4x8 for the posts should work and would be considerably cheaper, I think 2x4s are a bit of overkill for a yard of soil.
I just made this 5 X 3 with smaller anchors and it worked good!