Marble Tic-Tac-Toe Game
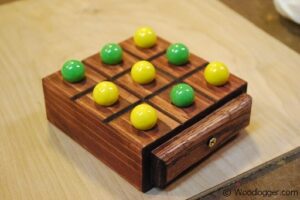
Looking for a fun and simple woodworking project? Look no further than this delightful Marble Tic-Tac-Toe Game! I crafted this charming game in just a few hours, making it an ideal beginner project for those new to woodworking. Not only is it quick to make, but it also guarantees endless entertainment for both kids and adults alike.
I’ve recently created several game pieces, and they are quickly becoming some of my favorite projects. Here’s why:
Quick to Create: This Tic-Tac-Toe game is straightforward, making it perfect for weekend woodworking enthusiasts.
A Hit with Everyone: Everyone wants one! This game is not just for kids; it’s a great addition to family game night that both kids and grandparents will enjoy.
Fun and Engaging: There’s something special about making a game that brings people together. You’ll have a blast playing with your family and friends.
One of the standout features of this board is its clever storage solution. The end opens up to store all the marbles when they’re not in use, ensuring you won’t lose any of your marbles during playtime!
For those looking to tackle this project, I’ve created a handy free project plan (PDF) that provides step-by-step instructions and a material list. Don’t forget to check out my collection of other exciting free project plans.
Additionally, I’ve made a video tutorial showcasing how to build this Marble Tic-Tac-Toe Game, so be sure to check that out below. If you decide to make your own version, I’d love to see how it turns out! Share your creations over on the WoodLogger Facebook Page.
Materials
Not a lot for this one. I used a single board that I was able to pickup at Lowe’s.
- (1) 2″ x 6″ x 4′ – I used untreated pine.
Milling & Assembly
Finishing
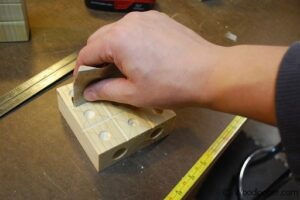
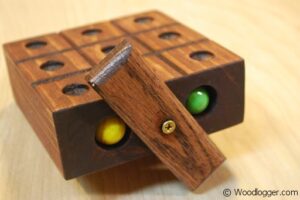 To complete the project, I began by sanding the entire piece using medium-grit sandpaper, followed by a fine-grit sandpaper to achieve a smooth finish. Sanding not only removes any imperfections but also helps the stain adhere better. For the stain, I chose a dark mahogany finish, which gives the board a rich and elegant look.
Tips for a Great Finish:
- Choose the Right Grit: Start with medium-grit sandpaper (around 120-150) to remove rough spots, then progress to fine-grit (220 or higher) for a polished surface. This two-step sanding process ensures a smooth finish.
- Sanding Technique: Always sand in the direction of the wood grain to avoid scratches that can show through the finish. Make sure to pay attention to edges and corners for a consistent look.
- Clean the Surface: After sanding, wipe down the board with a damp cloth or tack cloth to remove any dust. This step is crucial for achieving an even stain application.
- Test Your Stain: Before applying the stain to the entire piece, test it on a scrap piece of wood or an inconspicuous area to see how the color looks once applied.
- Apply Multiple Coats: For a deeper color, apply multiple coats of stain, allowing each coat to dry fully before adding the next. This can enhance the richness of the finish and provide more protection.
- Seal the Deal: Consider applying a food-safe finish, such as a salad bowl finish or mineral oil, after staining to protect the wood and enhance its durability.
By following these tips, you can achieve a beautiful and long-lasting finish on your project!

I really like the finish you chose on this board. Thanks for posting
Yep, I like the dark stain…
Dang bro that’s lit
Great Post I’m going to make one of these….!!
Same
Marble tic tac toe game!
Wow, I remember making the exact
One about 48yrs ago in grammar school. Still cool
This is a great project. I will probably make this for some stocking stuffers this year. I could not find the information anywhere. What is the final dimensions of the tic tac toe board?
hi