Benchtop Sanding Table
I absolutely hate sawdust! It’s my biggest nemesis when I’m woodworking. Seriously, I can’t stand it! I’ve installed some very basic sawdust removal tubes in some of my power tools, which helps with the larger debris. But the kind I loathe the most is that fine, powdery sawdust. It coats everything and seems to get everywhere, especially when I’m doing heavy-duty sanding.
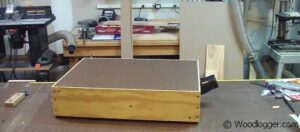
To tackle this issue, I’ve finally decided to build a benchtop sanding table to help reduce the mess. The basic design is just a box, measuring 5 inches in height, 23-1/2 inches long, and 17-1/2 inches wide.
Here are a few other tips to consider when dealing with sawdust:
- Use a Dust Collector: If you have access to a dust collection system, connect it to your power tools. This will significantly reduce the amount of sawdust that escapes into your workspace.
- Wear a Mask: Fine sawdust can be harmful if inhaled. Always wear a dust mask or respirator when sanding or working with materials that produce a lot of dust.
- Clean Regularly: Keep your workspace clean by vacuuming or sweeping up sawdust frequently. This prevents it from accumulating and becoming a bigger mess.
- Minimize Dust Creation: When sanding, use finer grits and techniques that produce less dust. Also, consider using a sanding sponge or foam block for a more controlled approach.
- Contain the Dust: Create a designated sanding area with plastic sheeting or tarps to help contain sawdust. This makes it easier to clean up afterward and keeps the rest of your workshop cleaner
Materials
For the lumber I used 3/4″ Plywood. I had enough scrap pieces to put the whole thing together. If you were buying new it would require nothing more than a 2′ x 4′ piece of plywood. For the top I used a 1/4″ tempered pegboard that I picked up at Lowe’s. The top will be cut down to 17-1/2 x 23″ and placed into the top of the box that will have a 1/4″ rabbit cut into it. Although I lucky enough to use scrap for most of my lumber, I still could have easily built this entire project for under $30.
- (1) 3/4″ x 2′ x 4′ Plywood
- (1) 1/4″ x 2′ x 2′ Pegboard
- (1) Universal Dust Port (I got mine from Amazon)
- (1) 3/4” Universal Rubber Bumpers (I got mine from Amazon)
Milling & Assembly
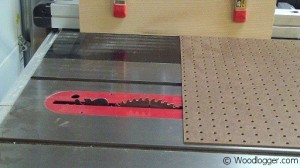 | I started by cutting the top of the sanding table. I used 3/16″ thick pegboard. In hindsight I think I would have preferred 1/4″ thick pegboard. The table has just a little bit of give to it. I think that extra 1/16″ would have shored it up. I cut the pegboard 17-1/2″ x 23″ using my tablesaw. |
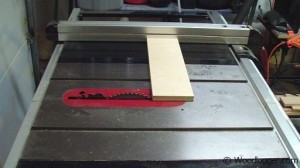 | Next up was the sides of the box. I was lucky enough to have scrap plywood to finish this project. I cut all of the sides to a width of 5″ first so it would be consistent. Then I cut the sides to a finished length of 5″ x 23-1/2″ and the front and back to a finished length of 5″ x 17-1/2″ |
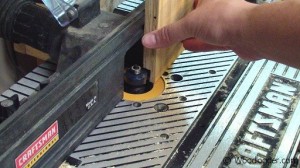 | For the joints of the boards I cut a rabbit joint on the two side boards. I cut a 1/2″ wide x 3/16″ (the width of the pegboard) deep rabbit. After I finished the top of the boards, I then went back and cut another rabbit joint that was 3/4″ wide and x 1/2″ deep. This will allow the front and back boards to fit into the sides to make a solid joint. I used my router table to cut the deep end of the rabbit and finished the width on my table saw. |
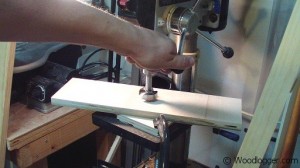 | After I had all of my sides cut, I then cut a hole for the dust collector port to be attached too. The width of the port I’m using is 2″. I could have simply used a jigsaw to cut this opening. I had a 1-1/2″ Forstner bit and I figured that was big enough. |
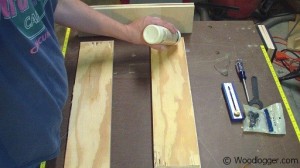 | To hold the box together I used wood glue along all of the joints. |
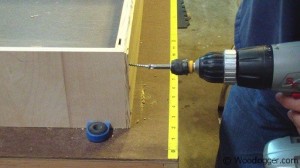 | To help make the joints even stronger I used (3) 1-1/4″ screws on all the sides of the box. |
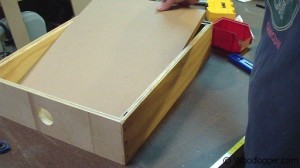 | After the box was together, I then cut a baffle. The baffle is really important to the air flow of the table. First it reduces the amount of space that has to be suctioned in half thus creating a higher suction. Secondly it helps to distribute the air flow across the top of the table evenly. |
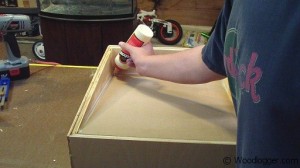 | To make the baffle I custom cut the length and width to box. I went from the top of back to the bottom of the front to get my length. You’ll want to make this a little snug as you need to get this as air tight as possible from the bottom and sides.To help make this more air tight I ran a thick bead of glue along the sides of the baffle. If I had some caulking it would have been better, but this seems to work pretty well too. |
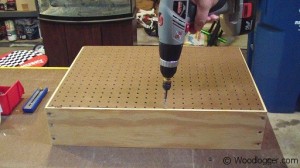 | I attached the top of the table by pre-drilling all of my holes into the top. I then slightly countersunk a 1″ screw in all four sides of the table. |
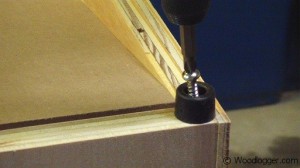 | To help reduce the table from sliding around I installed a 3/4” Universal Rubber Bumpers on all four sides of the table. |
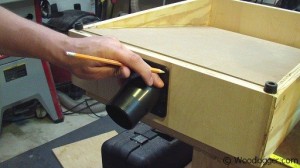 | I installed the Universal Dust Port over the hole that I cut previously. |
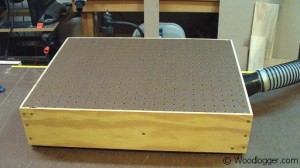 | Here is the completed table. I tested it out and it seems pretty solid. |
Finishing
Not a lot to finishing this one. I did attach rubber bumpers to the bottom of the box. That’s really a must as any sander is going to vibrate this box like crazy.
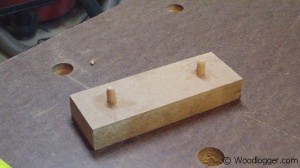
I also made a bench dog cleat hybrid that I could insert into the table. I can use this to help keep objects steady as their being sanded.
Enter your email if you want a free subscription to this site(we’ll never share your email):
Great posting! I believe that my husband will definitely follow this easy step by step guide on making sanding table. I will have to show him this right now. Thanks for sharing this.
Thanks Dana,
It was a pretty easy project, and I’ve used several it times now. Really helps cut down on the dust. Good luck with it.
Thanks this was a great post. I’m definitely going to make one of these..
Nice presentation for this useful project. You really should change a picture under the “Milling” section. You are showing the sides being cut to length using the table saw fence rather than the miter fence. That is an invite to a kickback party you or someone doesn’t want to attend ! Basic shop safety violation if ever there was one.
Cheers
kt
would love to see a video showing use of the benchtop sander
Hi. I do not have the tools to make the sanding bench (table top) can i request one to be made and sold to me?
Why the angled dust port?