Dewalt DW734 Planer – Review
I purchased the Dewalt DW734 Planer earlier this summer and what a great addition it has been to my shop. Full disclosure here; this is the first planer I’ve ever owned. I will attempt to give a fair review, but as I have no real basis of comparing and contrasting I can only give my impressions I’ve experienced over the past few months. I’ll also include links at the bottom of the page where you can take a look at Amazon’s price / description. I picked mine up at Lowe’s, but Amazon’s price is very competitive, plus having it delivered right to your door is nice. This thing is heavy! They also sell a good-looking table designed for the planer. I made my own, but this one is on wheels and has a nice lift with it. If you purchase one of these you’ll need to do occasional maintenance to it, check out my Dewalt DW734 Manintenace post for more information on that.
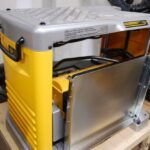
The first thing you’ll notice with the Dewalt Planer is just how solid the whole tool feels. This is a bench-top tool after all, but on the right cart it doesn’t feel like it. Dewalt has always had that rugged “this thing is probably gonna last” feeling to it. Another feature that was noticeable right away were the in-feed and out-feed tables. The tables fold up to save space however, one annoyance is that if you attach the back dust hood you cannot fold up the back table. It will have to remain down. Not a huge deal, but if you want to store the planer with the hood attached keep that in mind.
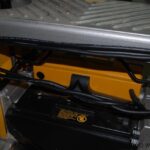
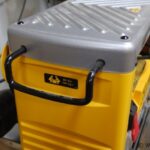
Another nicety is the cord storage; there are hinges that the cord can be wound up on. If you’re going to find a permanent home for your planer this may not be a big deal, but for the rest of us it’s a handy thing to have. Along the same lines if you’re going to need to move you’re planer around a lot it does have a nice set of handles on the top that make it easy to move. The planer weighs approx. 80 lbs. so I would recommend building or purchasing a cart for it. You’ll do your back a favor if you do. Dewalt makes a good-looking cool cart I have a link to it at the bottom of the post, definitely worth a look.
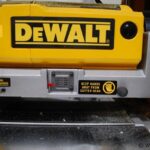
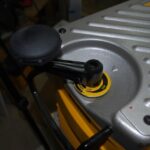
Another great feature on the planer is a depth gauge that allows you to dial in exactly how much you want to take off. You simply slide your board into the front where the Material Removal Gauge is(click on the picture on the right to see a close-up of the gauge). Then you just crank up or down to the depth you need. The gauge goes up to 1/8 of an inch. I usually do 1/32″ or 1/16″ and haven’t seen any problems.
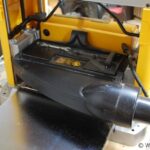
One thing that you quickly learn about planers is just how much saw dust they create. Depending on how many passes you need to make you can quickly feel a trash can full of sawdust. Really..! The Dewalt DW734 planer makes it a quite a bit less painful with the included dust hood. You simply attach the dust hood to the back of the planer and attach it to your dust collection system. If you don’t have a dust collection system I would recommend that you attach your shop vac to the end connector. You can pick up an adapter if needed at most places where they sell shop vacs. It’s worth doing considering the amount of sawdust that gets kicked out.
-
-
- 96 Cuts Per Inch
- 15 Amp Motor 10k RPM
- 3 Cutter Heads
- Dust Hood Included
- Uses Knives that are
Reversible and Disposable - Maximum cut depth of 1/8″
- Depth Capacity of 6″
- Width capacity of 12-1/2″
-
Summary
In conclusion I REALLY like this planer. The Dewalt DW734 Planer is sturdy, accurate, and easy to use. Dewalt products have a reputation as being dependable. To date, I have not experienced any issues with mine. With quality usually comes added price and with this planner there is no exception to that rule. It’s a little pricey, but considering what you’re using this for I would go with the better model. My only criticism of the product is that when you have the dust hood attached to the back of the planer there is no way to fold up the back table. Not a major deal, but in my small shop it’s definitely a small inconvenience. If you’re looking to purchase one check it out over at Amazon.
Looking for more information? Check out the Dewalt DW734 Planer Manual

I have had one for a couple of years, successor to my Delta. It has not failed to do anything I have thrown at it. This includes planing some 6″ x 8″ x 8′ pieces of yellow pine to be used as legs for an altar table at the local Boy Scout camp – talk about hard to handle!
I have it mounted on the base salvaged from a very old Craftsman radial arm saw, with locking casters; due to the noise I move it outside to use – keeps the wife happy, but the neighbors ? Agree that it produces a lot of shavings. I use a small, portable 750 CFM dust collector that moves easily, thus no 30 ft. hose to he central collector.
I really like this tool !
Have had one for awhile now and have no real complaints. Bought mine without the infeed and outfeed tables. Big mistake. Was able however, able to pick them up in a garage sale.
Only problem I have had was, I hit half a staple in the face of a board I had picked up at a Big Box store. Now I have a small bead on the faces of my work. Certainly not a fault of the machine though.
One suggestion to those who may be thinking about this machine. Rip your stock within 1/8″ to 1/4″ of finished width. This machine doesn’t really like wide stock but will handle it. Meaning a 1 x 12″ is a bit much if planning off much with 1st passes. Use light cut passes and it humks right along. Just takes a bit longer.
That last statement might be a bit unfair. I am used to planning with a 5 hp Woodmiser. I sold it because of it’s size in my small shop where real estate is a BIG problem. Kinda wish I had it back. Having both machines would be a big plus. One complimenting the other you know. LOL
I have had my planer for two years now. Have a question. Sometimes mine will not feed itself, I have to use a push board. Any suggestions
Raise the head as high as it will go and clean the rubber rollers with rubbing alcohol. Don’t use anything like mineral spirits or lacquer thinner on the rubber. Wear leather gloves as the blades are close – and sharp!
Then coat the bed with furniture wax such as Trewax or Minwax Paste Finishing wax. I use wax on the table saw, band saw, router table, etc. to reduce friction and make the wood slide smoothly.
This should solve the problem.
Thanks for that!